- Dual output channels
- Maximum 500 MHz output frequency
- 2.4 GSa/s Sampling rate, 16 bit vertical resolution
- Pulse frequency up to 150 MHz; Rise/Fall time adjustable, fastest 1ns
- TrueArb technology, Arbitrary wave length 2 ~ 20 Mpts
- IQ signal , PRBS, Nosie generator


In this note, we are going to use Equation Draw within EasyWave to create a waveform that is built using the addition of sine waves with two different frequencies (700 and 1900 Hz). We will then show how to use this signal to modulate a carrier up-to 500 MHz using the other SDG output channel.
EasyWave is free software designed to help create and edit arbitrary waveforms and download them to applicable SIGLENT SDG series of arbitrary waveform generators, including the SDG800, 1000, and X series. You can download it here: EasyWave
EasyWave has an interesting feature called Equation Draw that enables you to create complex waveforms using some common basic math and trigonometric functions, like +, -, *, /, sine, cosine, and more.
NOTE: Two-tone testing is commonly used to test the performance of audio data that is embedded in modulated signals like AM or FM radio broadcasts. You can use two-tone signals to check the performance of RF receivers. The ARRL and other radio-centric organizations have lots of data on testing receivers, for those so inclined.
Many of the SDG products have a wave combine feature that mathematically adds the waveforms for both channel 1 and channel 2. This is technically easier than the process we highlight in this note, but it requires the use of both channels of the SDG. The using a single output arbitrary waveform allows us to use the other free channel for other tasks, including sourcing a carrier modulated by our two-tone signal (see the end of this note for more info).
To learn about Wave Combine, click here: Wave Combine
Setup
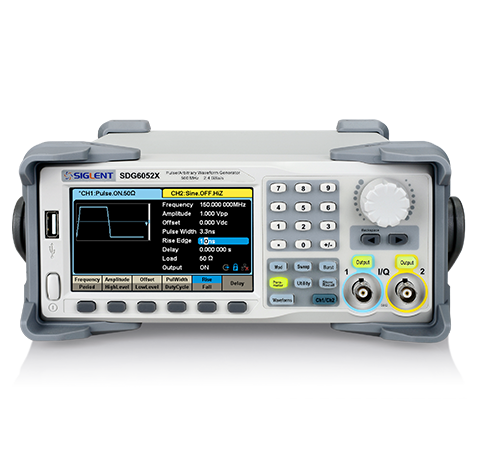
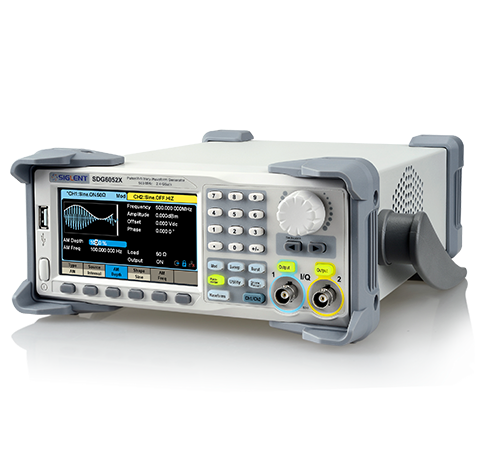
- SIGLENT SDG arbitrary waveform generator (We are using an SDG6052X capable of 500 MHz for this note)
- EasyWave software
- USB or LAN connection
Before beginning, please install EasyWave (The instructions are available with the download available here: SDG Software Downloads) and connect the instrument to the computer.
- Open EasyWave by double-clicking on the EasyWave Icon:

2. Open a new waveform:
3. Name the waveform (optional) and set the frequency of the main repeated waveform. In this case, we will set the Frequency to 100 Hz. Press OK:
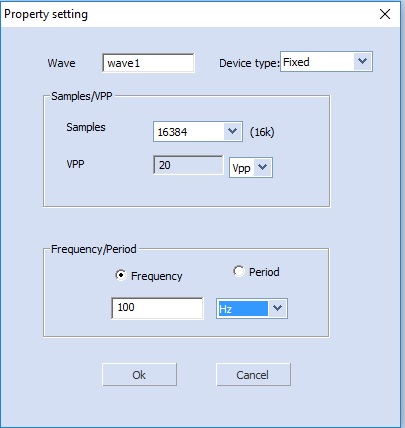
NOTE: The arbitrary waveform “frequency” is the repetition frequency of the entire waveform loaded into memory. If that waveform has a single period, then the set frequency here will be the frequency of the output waveform. If the waveform has 2 periods, then this frequency will be half of the actual waveform frequency (because there are 2 periods per memory “frame”). In this process, the frequency set in this step is equal to the “X” variable used in future steps.
4. This opens the wave1 waveform window. Now, click on the Equation Draw icon to open the equation editor. This includes a listing of available math elements as well as a saved equations area.
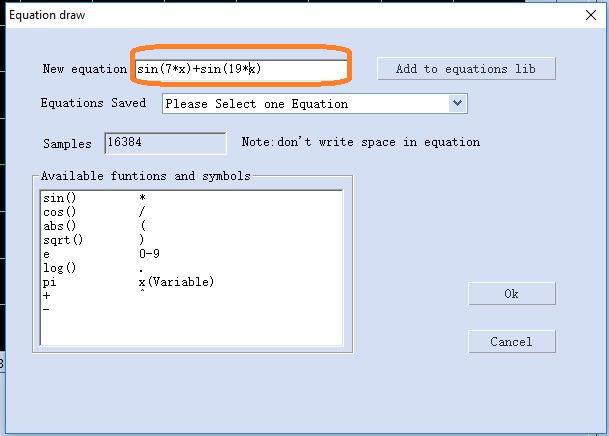
For this example, we want two tones… one at 700 Hz and the other at 1900 Hz. Since we set the output frequency to 100 Hz (remember we named that “X” above), we can simply enter our equation in the New Equation field using standard trigonometric functions as shown:
y(x) = sin(7*x) += sin(19*x)
Press OK to enter.
NOTE: This will create a waveform that is the addition of two sine waves. One with a frequency 7 times X (7*100 Hz = 700 Hz) and the other with a frequency 19 times X (19*100 Hz = 1900 Hz).
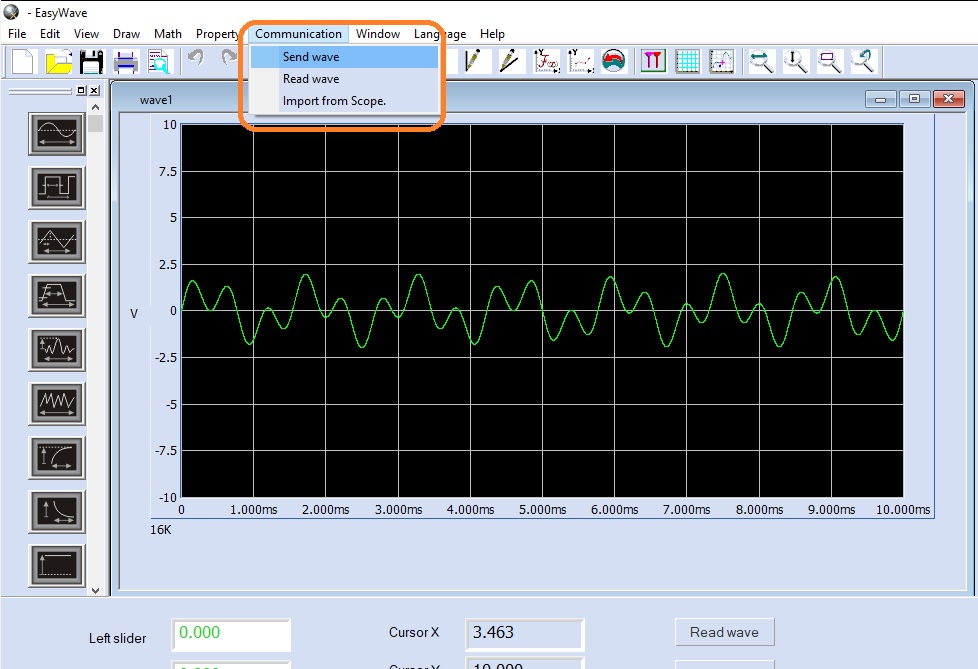
Now, the wave window shows a green waveform that represents the waveform we entered via the Equation Draw method. Confirm that it matches your expectations for your application.
5. Press Communication to open the dialog to begin downloading the waveform to the instrument:

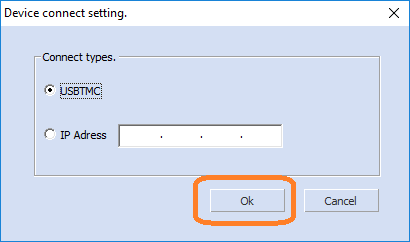
6. Select the connection type (USB = USBTMC) and press OK
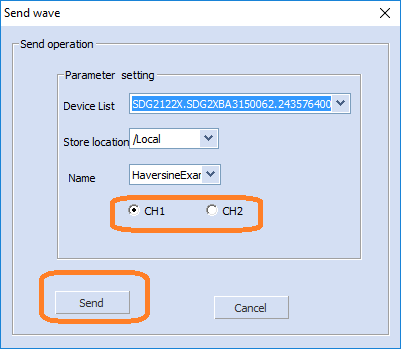
7. Select the correct USB device, Waveform Name, and Channel.. press OK:
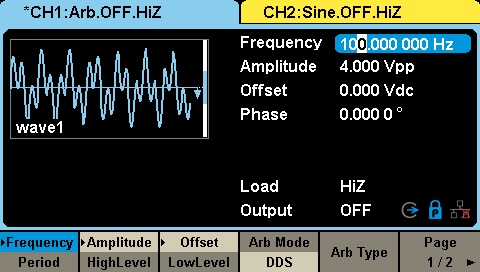
8. Now, you can observe the waveform and parameters on the display of the generator. Here, you can change the base frequency, amplitude, and other waveform characteristics.
Here is a screen capture of an oscilloscope using the FFT function to capture the spectral content of the output using the waveform created:
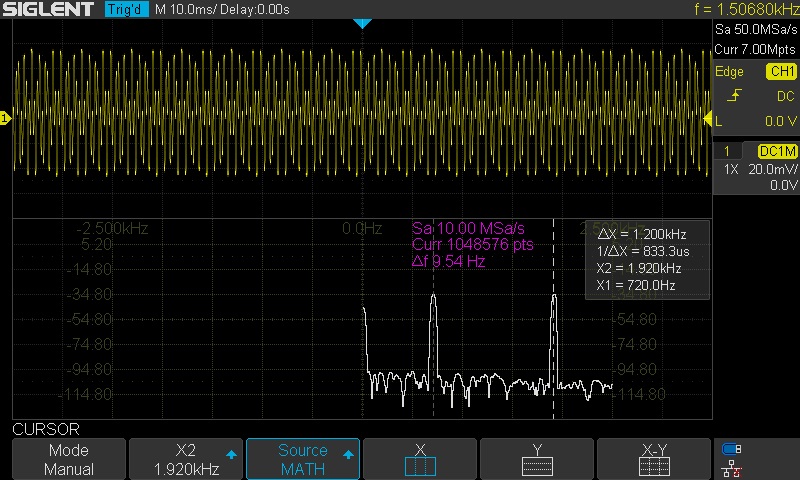
Note that the frequency markers show peaks at 700 and 1900 Hz, as expected.
Next Step: Source a two-tone modulated carrier
Now that we have verified the two-tone output, we can use this waveform as a modulation source for a higher frequency carrier. This modulated signal can be used to test the performance of a receiver.
Here are two options for creating a modulated carrier:
SDG External Modulation for carriers < 500 MHz
Many SDG generators include an external modulation input which can be used to modulate the output of a specified channel. In this example, we can simply route the two-tone channel to the external modulation input. Then, configure the other channel to output a modulated carrier.
Here, we will use the SDG6052X, which can output sine waves up to 500 MHz. As mentioned previously, this technique works with any dual channel SDG. When selecting a generator, remember that the maximum carrier output frequency includes the modulation bandwidth. If your generator has a maximum frequency of 100 MHz and the modulation bandwidth is 10 kHz, then the maximum carrier frequency when modulation is active will be 100 MHz – 10 kHz/2.
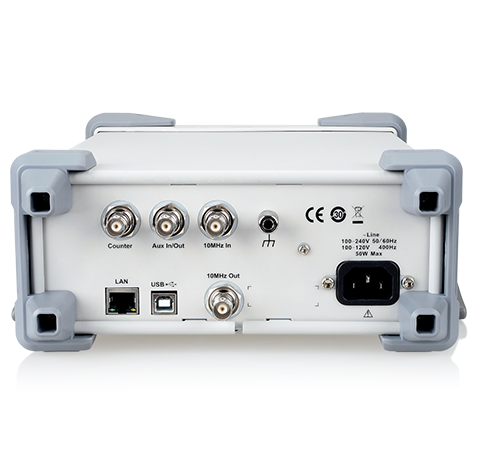
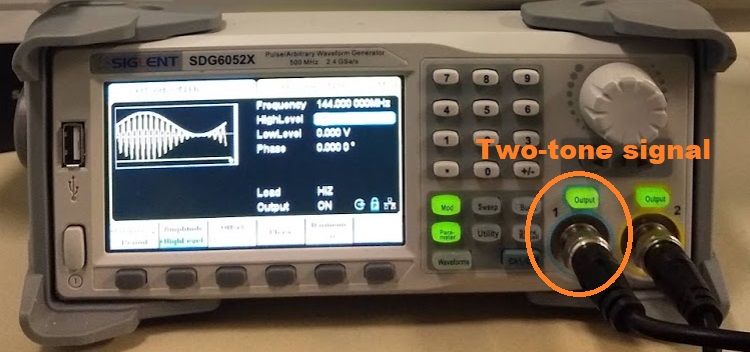
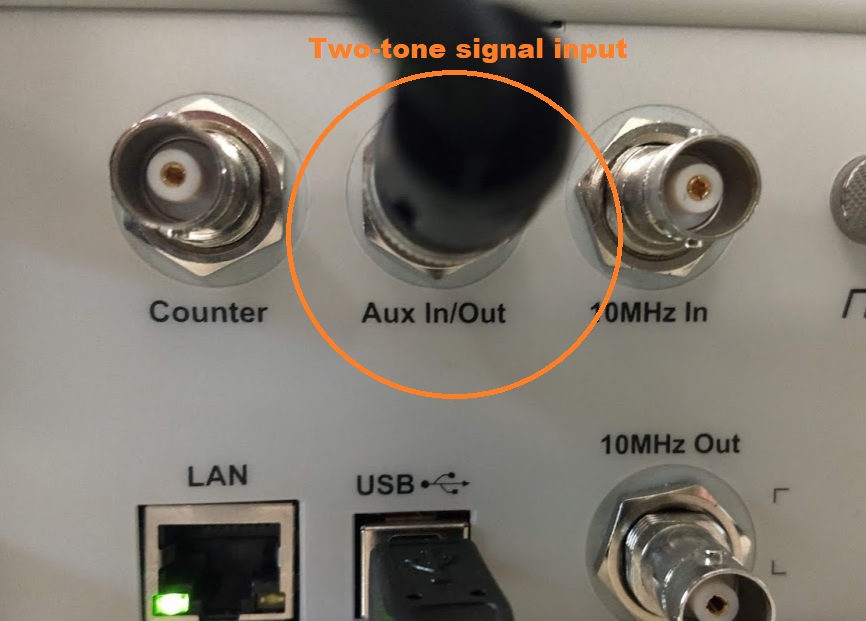
- Route a cable from the two-tone channel to the Aux In located on the rear panel. In this case, channel 1 is the two-tone source:
Front Panel:
Rear Panel:
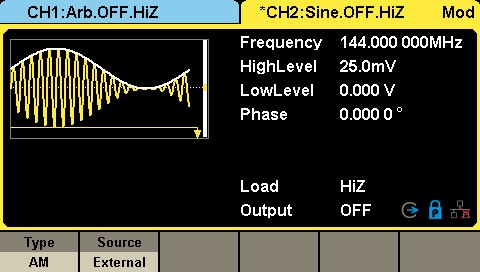
- Configure the other channel as the modulated carrier (channel 2, in this example) for external modulation by pressing Mod and configuring the channel as shown.
Here, we set the channel to use the external input to modulate an AM carrier with a frequency of 144 MHz, in the amateur radio broadcast 2m band :
Now, we can confirm the output using a spectrum analyzer.
Here, we connect the modulated carrier output (channel 2) into a SIGLENT SVA spectrum analyzer:
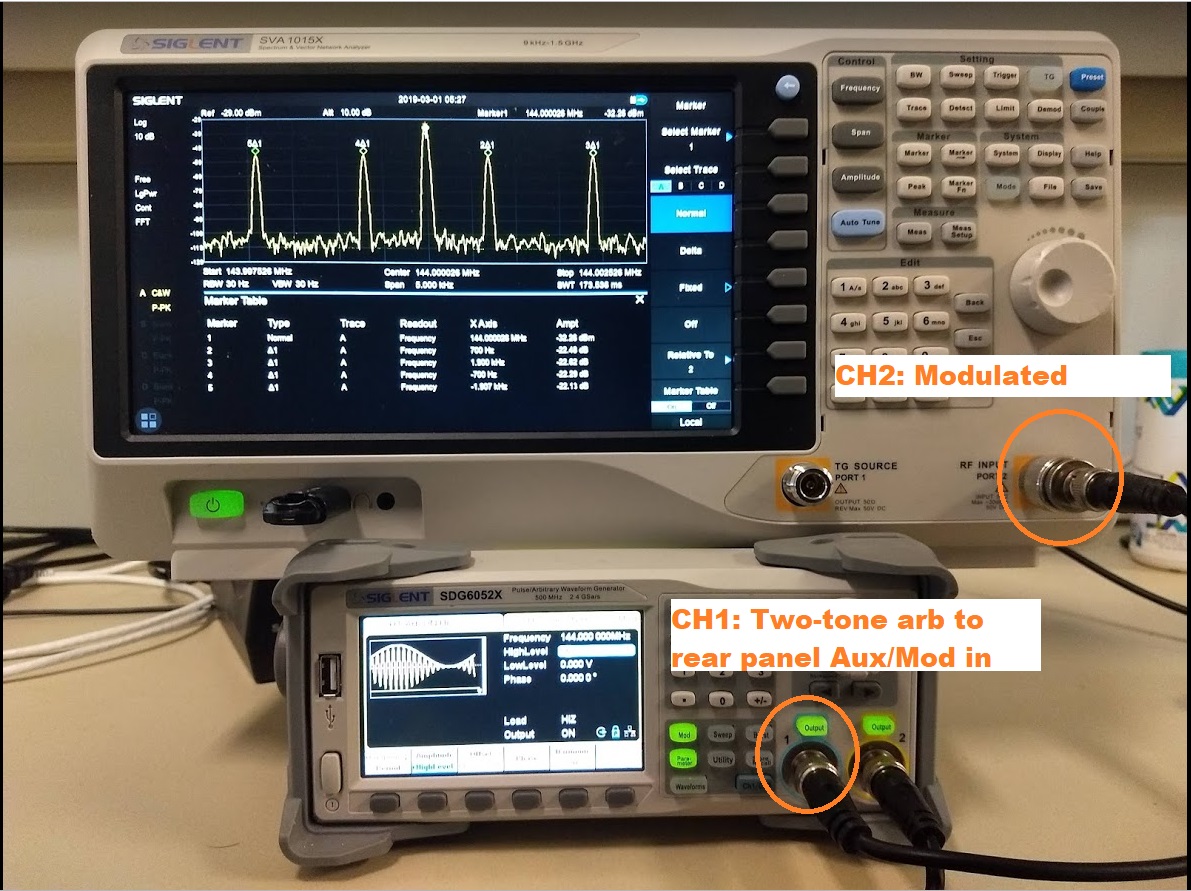
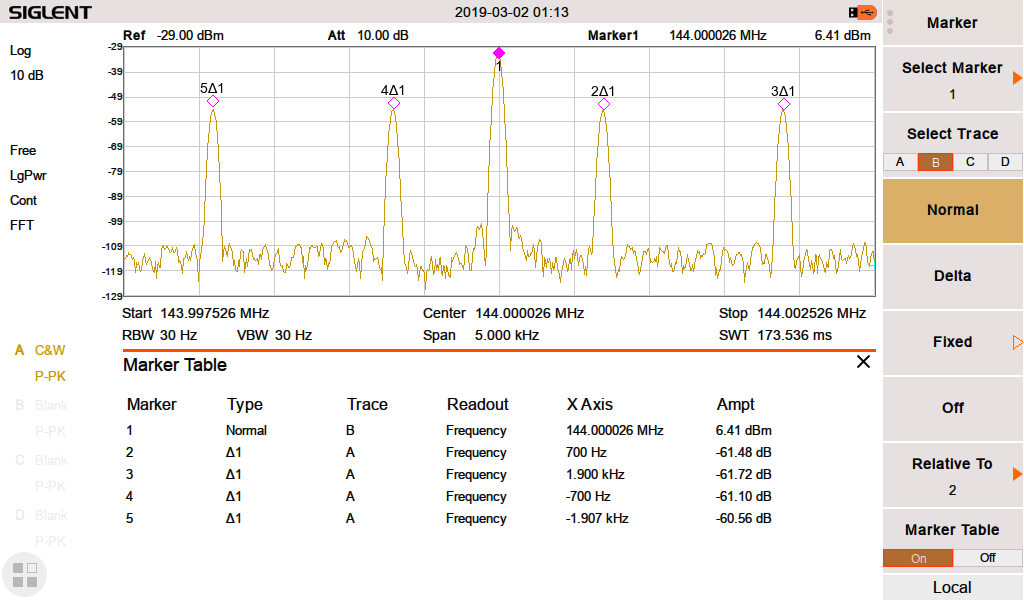
Here, you can see the carrier at 144 MHz, and the two tones at +700, +1900, -700, and +1900 Hz from the carrier.. as expected.
NOTE: Make sure that the output power of your SDG is low enough to prevent damage to the spectrum analyzer or add enough external attenuation to make sure you don’t damage the input.